Favorite Articles of the Moment
Disclaimer
• Your life and health are your own responsibility.
• Your decisions to act (or not act) based on information or advice anyone provides you—including me—are your own responsibility.
Recent Articles
-
We Win! TIME Magazine Officially Recants (“Eat Butter…Don’t Blame Fat”), And Quotes Me
-
What Is Hunger, and Why Are We Hungry?
J. Stanton’s AHS 2012 Presentation, Including Slides
-
What Is Metabolic Flexibility, and Why Is It Important? J. Stanton’s AHS 2013 Presentation, Including Slides
-
Intermittent Fasting Matters (Sometimes): There Is No Such Thing As A “Calorie” To Your Body, Part VIII
-
Will You Go On A Diet, or Will You Change Your Life?
-
Carbohydrates Matter, At Least At The Low End (There Is No Such Thing As A “Calorie” To Your Body, Part VII)
-
Interview: J. Stanton on the LLVLC show with Jimmy Moore
-
Calorie Cage Match! Sugar (Sucrose) Vs. Protein And Honey (There Is No Such Thing As A “Calorie”, Part VI)
-
Book Review: “The Paleo Manifesto,” by John Durant
-
My AHS 2013 Bibliography Is Online (and, Why You Should Buy An Exercise Physiology Textbook)
-
Can You Really Count Calories? (Part V of “There Is No Such Thing As A Calorie”)
-
Protein Matters: Yet More Peer-Reviewed Evidence That There Is No Such Thing As A “Calorie” To Your Body (Part IV)
-
More Peer-Reviewed Evidence That There Is No Such Thing As A “Calorie” To Your Body
(Part III)
-
The Calorie Paradox: Did Four Rice Chex Make America Fat? (Part II of “There Is No Such Thing As A Calorie”)
-
Interview: J. Stanton on the “Everyday Paleo Life and Fitness” Podcast with Jason Seib
|
As gnolls.org has become more and more widely read, I am receiving more and more questions from my readers in comments, on the forums, and over email—and a significant number of them boil down to “I have [a list of problems], what should I eat?”
First, let me be absolutely clear: I am not complaining! I work very hard every week to write articles that are not only worth your time—they’re worth forwarding to others using the social media buttons at the end. I’m glad you’re here.
However, I need to correct a common misconception. And though this article is mostly addressed to those new to paleo or the paleo-curious, it’s worth all of our time to briefly remind ourselves of a basic truth.
Getting Lost On The Path To Better Health
Most of modern medicine treats physical and mental dysfunctions as medication deficiencies.
- Acid reflux? You’ve got a proton pump inhibitor deficiency.
- Can’t sleep? A classic sign of Ambien deficiency.
- Insulin-resistant? Your metformin intake is inadequate.
- Depressed? Clearly your blood levels of Prozac are too low.
- High blood pressure? That’s textbook—you’re Toprol-deficient.
- Obese? Well…actually, we haven’t found a medication that doesn’t make you crap your pants. Maybe you should do some jumping jacks or something.
Even “alternative medicine” takes this approach, telling us we’re deficient in everything from crushed crab shells to olive leaf extract.
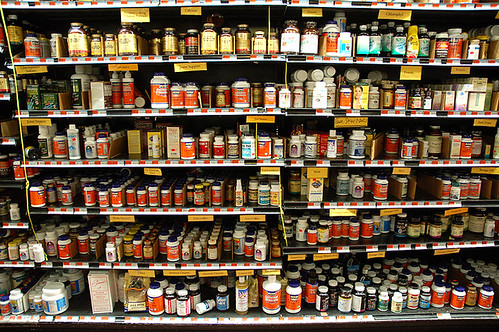 According to the labels, every one of these bottles is absolutely necessary for our good health. It's best not to ask how Paleolithic humans survived without them. Of course this is baloney, designed to sell us pills. But this pervasive approach has a more subtle destructive effect on our thinking: it lulls us into applying the same fallacious analysis to our dietary needs. Whatever’s wrong with us, there must be an individual dietary prescription to fix it. Some magical balance of protein to fat to carbs, some obscure rainforest fruit rich in antiphytocatopolyresistophenolins, a nut butter that won’t make us fat…
Yes, we all want to believe that we’re all beautiful and unique snowflakes, that each of us deserves a personalized fitness plan, our very own roadmap to better health. Even the paleo community falls victim to the weak version of this fallacy, which is throwing up our hands and saying “Since we don’t understand everything, hey, whatever works for you.”
Consequently, it is important to remember the following:
Afflictions that redefine “healthy eating” are extremely rare.
Acid reflux? Eat like a predator.
Can’t sleep? Eat like a predator.
Insulin-resistant? Eat like a predator.
Depressed? Eat like a predator.
High blood pressure? Eat like a predator.
Obese? Eat like a predator.
And so on.
Unless you have one of a few rare and specific conditions like phenylketonuria (for which you were either tested at birth or died of the complications) or seizures (for which ketogenic diets are often appropriate), it’s highly unlikely that eating a functional paleo diet will cause anything to get worse—and it’s highly likely that you will enjoy improved health, relief of some or all symptoms, improved body composition, and higher energy levels after the period of adjustment required by any major dietary change.
At this point it is important to note the disclaimer I’ve had on the left sidebar for some time:
• Your life and health are your own responsibility.
• Your decisions to act (or not act) based on information or advice anyone provides you—including me—are your own responsibility.
Furthermore, if you ask me “What should I do about my GERD/insulin resistance/recurring rashes/IBS/40 remaining pounds of fat”, the first thing I’m going to ask you is “How many of the steps from Eat Like A Predator have you taken?” If you’re still eating gluten grains, cooking with seed oils, consuming packaged foods (especially those labeled “heart-healthy” or “low-carb”), or drinking soda, my first advice will be “Then stop that.”
Occasional cheating is a different matter…I don’t want to encourage orthorexia by blaming everything on half a brownie you had three weeks ago. But you need to be honest about whether you’re really just cheating, or whether you haven’t fully committed to change.
Conclusion: Better Health Is Less Complicated Than You Think
It’s very profitable to make better health seem like a complex undertaking. If we view “health” as an individual prescription difficult to follow, nearly impossible to maintain, and only dispensed by authority figures, we’ll become dependent on the continual assistance of others—and their pills—and we’ll be forever running in circles chasing the next diabetes drug or magical rainforest antioxidant extract.
Don’t believe the hype. Our ancestors survived, thrived, and multiplied for millions of years, using only their wits and sharp rocks. Humans are not born with medication deficiencies—nor are we metabolically dependent on chemicals extracted at great cost from plants that only fruit or flower seasonally in one small region we didn’t even inhabit until perhaps 11,000 years ago.
No, eating like a predator will not fix every problem. (For instance, infections require antibiotics, antifungals, or anthelmintics…and if your beta cells are gone, you need exogenous insulin.) Neither will it fix your problems overnight: damage done over decades won’t heal fully in days, and some damage may be permanent. But as Dr. Doug McGuff once said about medical testing:
“If the number is bad, eat healthy.
If the number is good, eat healthy.”
You may well be a beautiful and unique snowflake—but you’re a human animal, just like everyone else, and your path to health begins just like everyone else’s.
Live in freedom, live in beauty.
JS
Postscript: Your questions are welcome! There is much to discuss, and plenty of room for optimization once you’re following the basic plan.
This is Part II of a multi-part series on real-world paleo cooking, for those of us with jobs and kids and commitments. Part I, “The Functional Paleo Kitchen”, starts here, and my introduction to paleo, “Eat Like A Predator”, is here.
Most recipes are useless for anyone who is employed, except as a treat on special occasions—and ‘paleo’ recipes are no exception.
That’s because most recipes, between the shopping and the cooking, simply require too much of my time. And afterward I always end up with small portions of half-used herbs, fruits, vegetables, and juices slowly rotting in the refrigerator, plus a rack full of spices I’ve used once or twice. It’s the “hot dogs in packages of eight, buns in packages of six” problem, multiplied until it takes over my kitchen. Does this sound familiar?
Here’s my quick and dirty technique for cooking delicious paleo food in a hurry. First I’ll show you the basic version—and then I’ll show you how to adapt it to create many different meals, with only a few small changes to spices and vegetables.
Before You Start: A Reminder About Meat
Meat is the foundation of any paleo diet—specifically, grass-fed red meat. As meat will keep for up to a year in a good freezer (6 months for paper-wrapped, 1 year for vacuum-packed), none of us has any excuse for running out. We do, however, sometimes have this problem:
Defrostration (n.) – the feeling you get when you realize that you’re hungry…and all 90 pounds of that tasty grass-fed meat you bought are still in the freezer.
So whenever you cook meat, get in the habit of pulling more from the freezer. Active paleo eaters can easily wolf down a pound and a half of meat per day!
Quick and Dirty Recipe #1: The Basic Paleo Scramble
Variants on this dish provide a substantial proportion of my calories because it’s easy, fast, and delicious. (Note that you’re never wasting any time: you’re preparing each ingredient while the previous ingredients cook.)
Here’s how I make it!
- Half a pound of fatty hamburger or diced stew meat. Diced leftovers of any meat work fine.
- 3 eggs.
- A potato or sweet potato. (Skip this if you’re zero-carb/VLC. Perfect Health Dieters can use white rice.)
- Vegetables of your choice. I like Anaheim and bell peppers, but if you like broccoli and cucumbers, great! Frozen vegetables work OK too.
- An onion. I recommend yellow onions, as they’re milder and sweeter.
- Several cloves of fresh garlic.
- Butter. Beef tallow is optional but recommended, especially if the meat is lean. Coconut oil is another good option, especially if you’re staying 100% dairy-free…but I think the basic version tastes best with butter.
- ‘Creole seasoning’. Tony Chachere’s is a bit hotter and more straightforward: Zatarain’s is a bit sweeter and more complex.
Important! You should always have all these ingredients in your refrigerator: the veggies are the most perishable item, and they’ll keep for over a week in a sealed container. Everything else, including the onions, will last for several weeks or months.
Also important! This will be needlessly difficult if you don’t have the recommended kitchen tools from Part I.
Note that if you’re a re-enactment purist who refuses to use butter or salt, my recipes will not be of use to you. Personally, I don’t see any convincing arguments against: our kidneys are perfectly capable of excreting excess sodium (lack of potassium is the real issue), and it’s difficult to argue that animal fat is healthy but butter isn’t.
This recipe serves 1 very hungry person, or 2-3 less hungry people. Feel free to adjust quantities according to taste once you’ve got the technique down. And it tastes great as leftovers…just drip a little bit of water on top and microwave it!
- Step 1: Put your 12″ skillet on a stove burner at medium heat. Let it preheat while you…
- Step 2: Get out your vegetable cutting board. Peel a potato and slice it thinly: a few millimeters is about right. If it’s a huge potato, chop the slices into a couple smaller pieces: the pieces should be bite-size. Use enough potato slices to cover about half your skillet with a single layer. This will be a small potato, or part of a large potato.
- Step 2.5: If your preferred vegetables include broccoli, other veggies that need a longer cooking time, or anything frozen, chop them now and add them on top of the potatoes.
- Step 3: Melt some butter in the skillet, covering about half of it with a generous layer, and add the potato slices to the melted butter. (If the butter burns right away, the skillet is too hot.) Make sure the slices lay flat and aren’t stacked on top of each other, or they’ll take forever to cook. Cover the skillet.
- Step 4: Dice the vegetables into omelet-size bits. I usually use about three slices of onion, plus most of an Anaheim or half a bell pepper. (Meanwhile, your potatoes are cooking. Sweet potatoes cook a bit faster than regular potatoes.)
- Step 5: Flip the potato slices as best you can: don’t worry if you miss a few. Dump the diced veggies on top of the potatoes. Cover the skillet again. (Covering the skillet makes everything cook much faster.)
- Step 6: Mince a few cloves of fresh garlic. Use more than you think you should: the eggs and meat absorb the flavor. The easiest way is to half-crush each clove with the flat side of your chef’s knife to loosen the husk, peel the clove, cut off the little hard part at the top, and mince all the cloves together in a pile.
 I’ve just completed step 8.
Note the snazzy purple potatoes! - Step 7.5: If you need to dice up some meat, do it now. I recommend using one cutting board for veggies and one for meat. (You did buy the cutting board set from Part I, didn’t you?)
- Step 8: Drop about half a pound of hamburger or diced meat on the butter and garlic. (If hamburger, chop it up evenly with the spatula.) Distribute the meat evenly on the empty skillet half. Cover the skillet.
- Step 9: Once the meat has cooked about halfway to desired doneness, mix the meat, veggies, and potatoes together, and push them onto one half of the skillet.
- Step 10: Melt some butter on the unused half of the skillet. Cover the bottom well, and crack 2-3 eggs on top of the butter. Puncture the yolks unless you like underdone yolks in your scramble.
- Step 11: Shake some Zatarain’s or Tony Chachere’s over everything. Don’t be shy with it.
- Step 12: Once the bottom layer of egg is partially cooked, flip it over/push it around and get the rest cooking. (Imagine you’re making scrambled eggs, or an omelet.)
- Step 13: Once the eggs are about 3/4 done, scramble them together with everything else. Too early and they’ll make a mess: too late and they won’t mix well. Don’t cook the eggs too hard or everything will get all rubbery.
- Step 14: When the eggs are done, it’s ready to eat. Drop it onto a plate and enjoy!
Cleanup: The Inevitable Aftermath
Another problem with most cooking is that cleanup and dealing with leftovers takes forever. But since you’ve already bought a bunch of storage containers as per Part I, all you have to do is put the half-used vegetables in one container, put the unused meat into another container, put any leftovers in a third, and shelve them in the refrigerator. Then you can wash off the skillet, cutting boards, and chef’s knife with your dish brush, and you’re done! (You can even leave the washing for later if you’re running late for work.)
Trust me: this seems like a big, involved recipe, but once you’ve done it a couple times you’ll jam it out in the time you’d spend waiting for a burrito.
Variations On The Basic Paleo Scramble
Toppings!
Drop some avocado chunks on top of the final product, melt some cheese in with everything (add it after you add the meat), top it with a blop of sour cream—or go crazy and do all three!
The “Chinese-ish”
Often I like a more Asian taste to my scrambles: I think this is my favorite of all the variations! To do this, you’ll need:
- Fresh ginger root.
- Gluten-free tamari. (Tamari = soy sauce.) ‘Health food’ stores will usually have this. Meanwhile, just use up your soy sauce if you aren’t celiac. (I’ve heard that ‘coconut aminos’ taste very similar if you’re trying to avoid all soy products.)
- Hot pepper flakes. (White pepper is another option. So is Sriracha.)
- Optional: sesame seeds, coconut oil. Technically you should use roasted sesame oil, but it’s a giant omega-6 bomb.
- Optional: Snow peas, bamboo shoots, water chestnuts, bok choy, or other Asian vegetables.
- Optional but highly recommended: Five Spice Powder. This is the secret ingredient! Many supermarkets don’t carry it: here’s a boatload for cheap. Go in with some friends and you’ll all have a multi-year supply. Or visit your local Asian supermarket.
Follow the directions above, except:
- Substitute whatever Asian vegetables you like.
- Use coconut oil instead of butter, if you have it.
- Mince equal proportions of ginger root and garlic in steps 6-7 (it’s hard to add too much ginger) and add them to the butter together.
- Shake a bunch of sesame seeds, some Five Spice Powder, and a few hot pepper flakes on top of the ginger, garlic, and butter in Step 7. I can’t give exact amounts because Five Spice Powder varies between brands—but go easy the first time.
- Add a tablespoon or two of soy sauce in Step 11, instead of the Creole seasoning.
Other Root Vegetables
You can try carrots, turnips, beets, or cassava instead of potatoes. Carrots need a longer cooking time.
The “Leftover Steak”
Often if I have leftover cooked steak, roast, or any other meat, I won’t throw it in with the scramble: I’ll just cut it up and put it on top, cold. It tastes great that way!
The “Hot Chili”
And here’s a delicious chili taste. I like this one when I’m just doing meat, eggs, and veggies without the potatoes, or even just meat and veggies. (Magic spice ratio courtesy of The Well Done Chef.)
You will need:
- 3 parts chili powder. I make my own from crumbled dried Ancho and Japones chilis, but store-bought works fine.
- 2 parts paprika.
- 1 part ground cumin.
- Dash of oregano.
- Salt.
Shake them over everything in Step 7. BOOM!
The “Thai Curry”
This is absolutely delicious and surprisingly easy! You will need:
- Can of coconut milk. Note that the directions on the can say “shake well before opening”—but if you live in a cold climate, shaking will be hopeless because all the fat will be completely solid. You’ll have to open the can, transfer the contents into a jar (save those spaghetti sauce jars, kids!), microwave it for a few seconds, and stir it well.
- Jar of Thai curry paste. I think red goes best with beef, yellow with chicken, and green with pork—but they’re all good. Sadly the ubiquitous “Thai Kitchen” brand, once very good, has gone far downhill in recent months, requiring several times the recommended amount to taste like anything at all. So here’s what you want: genuine Made In Thailand “Mae Ploy” brand curry paste. (If you’ve got access to an Asian supermarket, absolutely go there, as it’ll be cheaper and you won’t have to pay shipping. Coconut milk will be cheaper there, too.)
- Basil. Fresh Thai basil from the Asian market tastes best, but dried is acceptable. A lot of Thai recipes call for cilantro too, but I think it tastes better without.
- Optional: fish sauce. A little bit makes the curry taste pleasingly authentic, but go easy or your house will forever smell like anchovies.
- This version works much better with meat chunks instead of hamburger, and is also great with chicken or pork. And I usually cook it without potatoes…just meat and veggies.
Follow the directions above, except:
- Spoon in enough coconut milk to cover the potatoes in Step 5. If you didn’t use potatoes, just put the coconut milk in first.
- Add curry paste to taste, and mix it in with the coconut milk. I can’t give an exact amount because each brand is different, but the directions on the tub will give you a starting point.
- Mince and add the fresh basil, or add a few shakes of dried basil.
- Cook everything uncovered so the water has a chance to boil off of the coconut milk.
- Add a tiny squirt of fish sauce when you add the meat. Go easy until you find out how much you like: that stuff is strong!
- Don’t add eggs! It’ll just make a mess. There’s plenty of fat in coconut milk.
Conclusion: Real-World Paleo Cooking
I’m sure you can see a pattern here. Instead of thinking of day-to-day “cooking” as a collection of individual recipes, think of “cooking” as a collection of spicy tastes that you can mix and match in a skillet, according to your mood and available vegetables.
- Don’t want eggs, vegetables or starch? The “Thai curry” taste works great with nothing but meat chunks.
- Want a spicy omelet? Omit the potatoes.
- Not feeling the eggs? Use that ridiculously fatty meat you didn’t quite know how to cook.
- Looking for more spice ideas? Try Penzey’s.
- And make it all new again by changing your suite of vegetables.
Coming soon: Part III, MEAT.
Live in freedom, live in beauty.
JS
Do you have your own favorite spice and vegetable combinations I should add? Got any hints for Indian curry spicing, yogurt or cream-based sauces, or anything else? Please let me know by leaving a comment! I hope to continually improve this article with reader ideas.
This is Part II of a multi-part series on basic techniques for real-world paleo cooking. Part I, “The Functional Paleo Kitchen”, starts here, and my introduction to paleo, “Eat Like A Predator”, is here.
A final note: I don’t have a diet or recipe book to sell you. One of the joys of ‘going paleo’ is that it doesn’t require a series of books to explain it. But if you enjoy my writing here at gnolls.org, you’ll most likely enjoy my “Funny, provocative, entertaining, fun, insightful” novel The Gnoll Credo. Read the glowing reviews, read the first 20 pages, and buy it on Amazon for just $10.95. (Outside the USA? Click here.)
So you’ve been inspired to eat real food: a paleo diet.
Great! You’re taking a big step towards better health and more energy.
But as you survey your kitchen, you realize that your refrigerator contains only beer and condiments, your freezer is full of precooked industrial products, your pantry is full of bread and pasta, you’re eating out all the time anyway—and suddenly you’re expected to instantly know how to cook all your own food from scratch when you can’t even use the few recipes you know?
Fear not! We are eating like predators, but that doesn’t mean we have to eat raw wildebeest out of a mud puddle that an elephant crapped in.
Let’s get started!
Kitchen Tools and Utensils
You don’t need a cupboard full of gadgets to cook and eat delicious food. I am all about the 80% solution: 20% of the effort (and cash outlay) solves 80% of your problems. And frankly, these are tools you should own no matter what kind of food you cook.
For your convenience, I provide links to purchase many of these supplies from Amazon…but if you can find them cheaper locally, go for it! (All links and recommendations are up to date as of 2/2013.)
I assume you already have a functional stove and oven, and some basic kitchen supplies like a 3-quart saucepan, measuring cups and spoons, and a dish brush.
- You must have a good 12″ covered skillet.
If you’re a kitchen klutz who will burn or scratch a non-stick pan, get a cast-iron skillet. (Here’s the glass cover.) Cast iron takes longer to heat up, heats less evenly, and it’s more trouble to keep clean and seasoned, but you’ll never completely destroy it and it’ll sear a steak better. (Seasoning and maintaining cast iron is a whole another article in itself.)
However, I recommend a non-stick skillet: it heats up more evenly, cleans up more quickly, and is far more convenient to use. Non-stick cookware requires careful care, though: you must be careful to never overheat it, and you must NEVER use metal utensils. This one is quite usable, and here’s what I have. And here is a nylon spatula if you don’t already own one.
- You must have a decent chef’s knife, and a steel to keep it sharp.
You don’t need a $100+ Henckels, Shun, or Wusthof so long as it’s forged, high-carbon stainless and you know how to sharpen it. This is the cheapest usable set I’ve found because it includes the steel. If you’ve got a higher budget, I’ve owned these for over ten years. (They are likely to last the rest of my life.) And you can spend as much as you like…but if you want a handmade work of art, not just an expensive brand name, I would go here.
Note that you only need one chef’s knife: think of the smaller ones in the set as slightly inferior backups.
- You must have at least two large cutting boards.
This lets you dedicate one board to meat, so you don’t have to worry about cross-contamination. Also, an outer groove is important when you’re cutting lots of meat so you don’t get blood on your counter.
Wood is more hygenic, being naturally antibacterial, but you must keep it oiled or it’ll split—and if it doesn’t have rubber “feet”, you must prop it up to dry or it’ll warp. Here’s a reasonably priced, usable set: some swankier alternatives are here and here.
Plastic harbors far more bacteria than wood (reference—hat tip to reader Scotlyn), but it’s dishwasher-safe and nearly impossible to ruin. These are good and well-priced.
- You must have refrigerator storage containers to hold meat, veggies, and leftovers.
Stretching plastic wrap over bowls and plates gets old quickly: Gladware, Takealongs, and Ziploc are the three big brands of reusable containers. Get two that are large enough to hold a roast or a steak, several that are large enough to hold a few vegetables, like a partially-used onion, pepper, and avocado, and several to hold individual servings of food so you can freeze them, take them to work, or just store leftovers. Stay away from off-brands: they often don’t seal correctly.
These will be much cheaper at the supermarket—but if you can’t find the big ones, try here (click on “Large Rectangle”).
- You must have a 6-quart or larger slow cooker.
Get the kind with the lid that seals tightly: I like this one. (Here’s one with a thermometer shutoff, which is convenient but more expensive.) The inner ceramic pot doubles as an oven-safe container for roasts, stews, and chili.
Cooking Fats
Since seed oils are now off limits, you’ll need some delicious saturated fats to cook with!
- You must have at least one pound of butter in your refrigerator at all times.
This rule is not negotiable. Butter is cheap, it’s available everywhere, and it makes everything taste better. (Yes, there are paleo purists who eschew butter: unless you’re frankly allergic, I view this as re-enactment, not science.)
The downside of butter is that it burns at a relatively low temperature, so you’ll have to limit your high-temperature frying and sauteeing, or use something else, like…
- Strongly consider coconut oil.
Virgin oil tastes like coconut and burns a bit more easily…refined oil is more neutral-tasting and stands up better to hotter cooking temperatures. There are some claimed health benefits to the virgin/unrefined stuff, but it’s tough to cook with unless you want everything to taste like coconuts. I use organic refined coconut oil for most of my cooking.
Grocery stores often hide coconut oil in the “health food” section. If you can’t find it, I buy mine here.
- Consider ghee.
Ghee is butter from which the residual proteins, sugars, and water have been removed (‘clarified butter’), leaving only pure butterfat. It’s frequently used in Indian cooking, and is suitable for high-temperature cooking and frying. And it’s delicious!
Ghee is hard to find except at Indian markets: you can buy some here, and the big jar here. Make sure it’s real ghee: there exist synthetic seed-oil based ghee substitutes which are equivalent to margarine, and which are just as unhealthy.
It’s actually not difficult to make your own ghee from regular store-bought butter: you can make a big batch in about half an hour. Here’s a tutorial: the more you make at once, the easier it is to just pour off the ghee, as the solids mostly stay at the bottom.
- Consider beef tallow, preferably grass-fed.
Unfortunately it’s almost impossible to find because of rampant saturated fat phobia, but it’s my favorite cooking fat for meat dishes and potatoes. I only know one source, and it’s expensive, costing over $10/pound for 2.25 pounds (but under $3/pound if you buy 5 gallons). If you have time, you can wet-render your own: here’s a tutorial.
Live in freedom, live in beauty.
JS
Are you getting hungry? Yes, you are. Continue to Part II: “The Paleo Scramble”, A Basic Technique For Real-World Cooking.
Have I missed something important? How can I improve this list? Please let me know by leaving a comment!
|
“Funny, provocative, entertaining, fun, insightful.”
“Compare it to the great works of anthropologists Jane Goodall and Jared Diamond to see its true importance.”
“Like an epiphany from a deep meditative experience.”
“An easy and fun read...difficult to put down...This book will make you think, question, think more, and question again.”
“One of the most joyous books ever...So full of energy, vigor, and fun writing that I was completely lost in the entertainment of it all.”
“The short review is this - Just read it.”
Still not convinced?
Read the first 20 pages,
or more glowing reviews.
Support gnolls.org by making your Amazon.com purchases through this affiliate link:

It costs you nothing, and I get a small spiff. Thanks! -JS
.
 Subscribe to Posts Subscribe to Posts
|
Gnolls In Your Inbox!
Sign up for the sporadic yet informative gnolls.org newsletter. Since I don't update every day, this is a great way to keep abreast of important content. (Your email will not be sold or shared.)
IMPORTANT! If you do not receive a confirmation email, check your spam folder.
|